WHAT ARE THE KEY STEPS FOR CREATING QUALITY BEVERAGE IMAGERY?
Have you ever wondered why advertising photography often appears stunning, yet your own images don’t seem to have that same drool-worthiness quality about them? Well, let's get into that. This first blog post may just shed some light on that as it will explain the steps that we take during beverage photography shoots to create quality images.
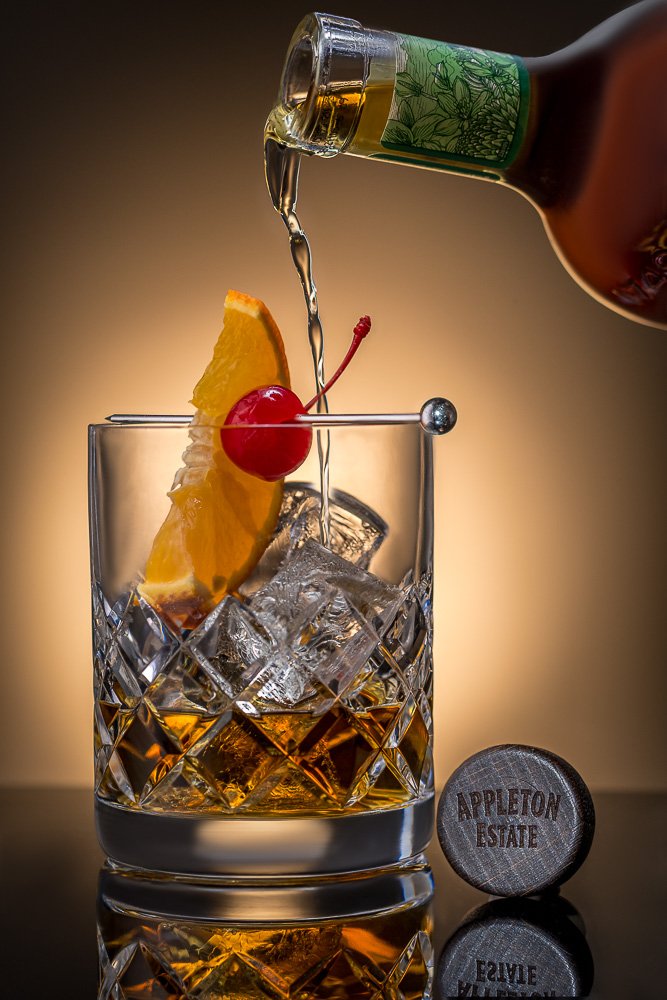
If you were to ask us which one of our photographs is really ‘us’, then I would have to say it’s the one above. We thoroughly enjoy beverage photography. And no, it’s not because we get to drink them afterward, as to be perfectly honest, by the time we finish a photoshoot they are rarely worthy of drinking anyway. No, I would have to say that the attraction is the challenge, as they are far from easy, and often seriously difficult. But it’s a challenge that is fun to address and one that we relish rising to.
Our secret to producing quality beverage images is to fully embrace composite editing. This isn’t a technique that is limited to just drinks as it can be used with any subject matter, but it is perfectly suited to helping us address common difficulties found in beverage photography. It’s become a go-to tool for a couple of reasons. The first is that we always have to deal with highly reflective objects. Beer cans act as mirrors, reflecting just about anything in the room. Glasses and other objects in the scene get reflected, both in cans as well as liquor and wine bottles, and vice versa. Despite our best efforts to eliminate these reflections, and believe me, we have plenty of tricks up our sleeve, they frustratingly happen anyway.
But that isn’t the full extent of our problems. Getting a pour just right may take countless attempts and many frames. That may not be such a big deal when dealing with a coffee shot or even a mocktail, but as soon as the subject becomes an expensive liquor, you can bet it becomes a big deal, as any liquor that cannot be recovered and reused adds additional unwanted expense to the shoot, and boy do all those pour attempts add up and become a significant dollar amount!
These two problems may appear completely disparate, as after all, what do reflections have to do with the price of liquor? The quick answer is that they have nothing whatsoever in common, but their solution is the same. The easy way to eliminate the reflection issue is to shoot a scene in stages.
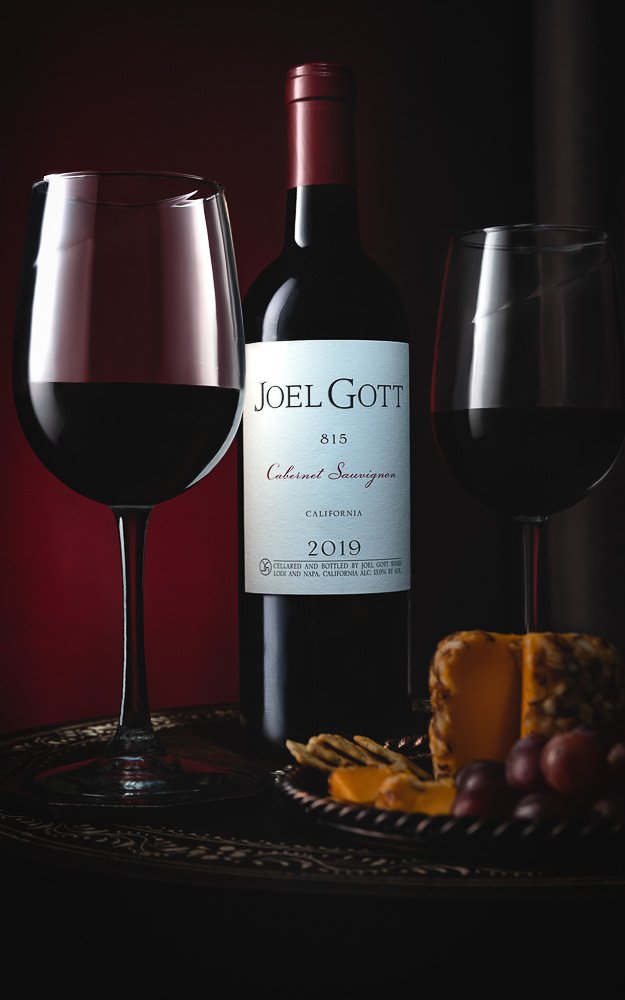
Take the wine image above as an example. Did we simply place the wine bottle, glasses, and the cheese platter in the scene, press the shutter button and call it a day? I wish! It may only take 1/200 of a second to take a photograph. But exceptional photography executed correctly is neither quick nor simple, it takes a great deal of patience. This is a scene that is typical of reflections from hell…the glasses reflect in the bottle, the bottle reflects in the glasses, and the cheese? Well, that reflects in everything. Composite editing enabled us to shoot the scene one element at a time, glass, bottle, second glass and then the cheese platter, and then carefully blend them together in post-production. That takes time, but it creates a far more pleasing image.
Now let’s switch to the problem of expensive liquor. A shot such as the rum pour at the beginning of this post will likely appear to be straightforward, but whenever we assume a shoot is going to be easy, it is always the complete opposite. Every single time!
At the outset, we visualize the glass to have just the right amount of liquor in it. That of course is subjective, but once that goal is created, nothing, and I mean nothing, will allow any form of deviation. The pour itself is equally subjective, not too fast or too slow, and with just the right amount of light glistening on that delicious liquid. More subjective goals that cannot be deviated from! The bottle angle has to be just so as well, as does how the light plays with the glass and ice. With so many subjective goals, it may be no surprise that we will make many attempts to obtain the perfect pour, and depending on the liquor we are shooting, that can become very expensive very quickly.
So how could we overcome this issue? As with any problem, break it down into bite-sized chunks. It is much easier to focus (and that pun was completely intentional) on each scene element in turn, just getting that one individual element just so without having to worry about every other element in the scene. Returning to the rum image, our approach for that shot was to again capture several individual frames and then carefully blend them together to create the final image. The rum shot consists of six individually captured and blended frames. It started with the cork in isolation, as that is easy so let’s go for the quick win. The second step was to capture the glass with only the ice and its associated light interplay. We then added just the right amount of rum to the glass. Next up was the garnish, leaving that late in the process so that it wouldn’t die during the shoot. We then progressed to the pour, which as expected took several attempts, but not as many as we would have had we attempted to shoot the whole scene in one go. And finally, to wrap up the shoot, we captured the bottle itself. I call that the final frame, although we did capture the background in isolation as well, if only as insurance in case it was needed in post-production.
Beverage photography is fun, but it also comes with many unique challenges. But as with any problem, they can be overcome and eliminated once broken down into smaller chunks. And to us, that is the attraction. If you have any issues with your beverage visual creation, then we have the knowledge to deliver. Yes, it will be challenging, but it’s a challenge that we relish rising to, and thanks to careful blending, this type of shot does not have to cost the Earth!
True Images Photography provides professional beverage and food commercial photography that gets your business noticed. Feel free to book a free 30-minute consultation here.
Do look around the rest of the blog here for more helpful posts, and if you have any questions please reach out. I’m happy to advise. You can also connect with me on LinkedIn where I always answer messages with a detailed reply.


